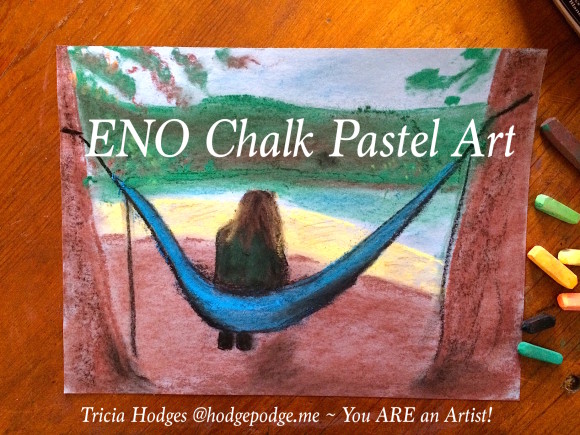
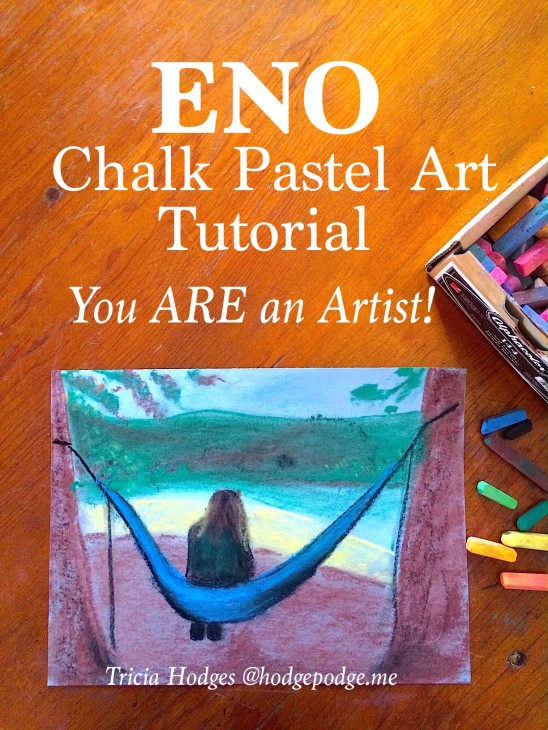
Any time the weather starts to turn a bit warm and breezy, we long to spend some time outdoors. Often that means time in the ENO, gazing up at the trees and the blue sky. So, we thought it would be fun to follow up our outdoor time with a favorite ENO hammock chalk pastel art scene.
-Looking for an ENO hammock chalk pastel video art lesson? Find Nana’s lesson in the Summer Art Camp section of the You ARE an Artist Clubhouse!
ENO Hammock Chalk Pastel Art Tutorial
Now, you might want to create your ENO scene in a different setting. Maybe your ENO is strung up between two palm trees at the beach! Remember, you ARE an artist and you can create your own view. Our view was inspired by a fall photo at a favorite state park.
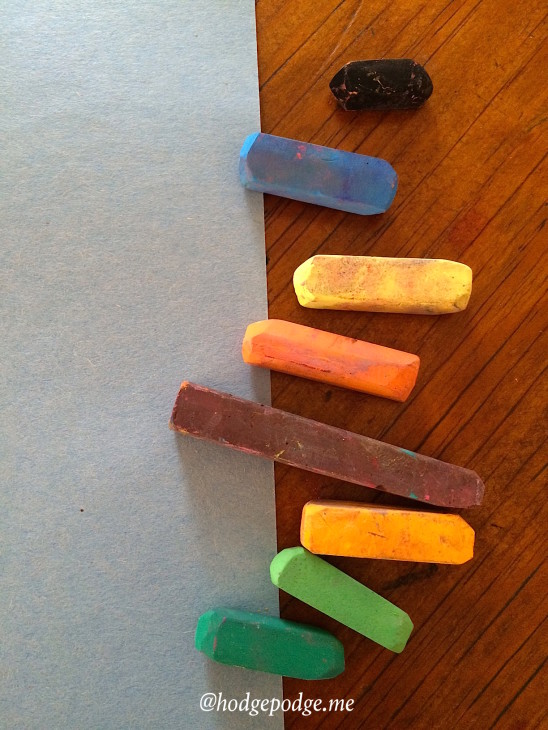
Chalk Pastel Art Supplies Needed: light blue construction paper plus brown, black, green, light green, yellow and blue chalk pastel colors.
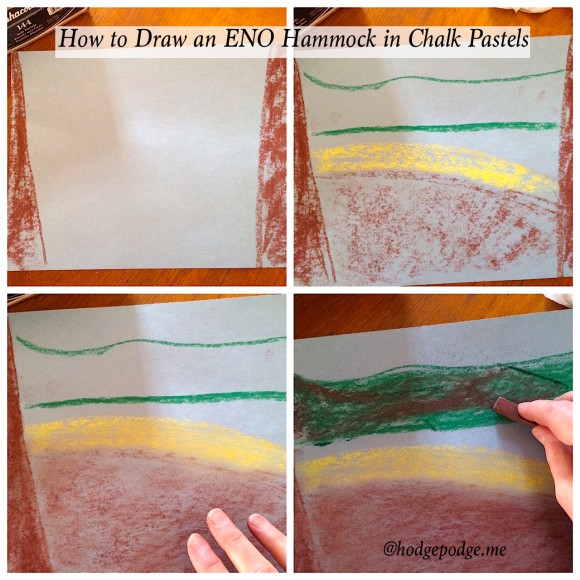
To begin, turn your light blue construction paper horizontally. You will ‘anchor’ your ENO by hanging it between two sturdy trees. So, with your brown chalk pastel, sketch the thick trunks on either side of your paper.
There is also the brown ground, though it is not as dark as the trees. The ground slopes down to a sandy beach next to the lake. Our sand is yellow because of the brilliant sun. In the distance – across from the lake – is the curve of the mountains. So keep all of this in mind as you build your scene. Take your time as you add each element. The light blue construction paper background becomes your lake and your sky.
Then take your fingers and smooth in the colors. This is a relaxing and dreamy ENO chalk pastel art scene. Add a bit of dark brown and maybe just a few black shadows for trees – over across the lake.
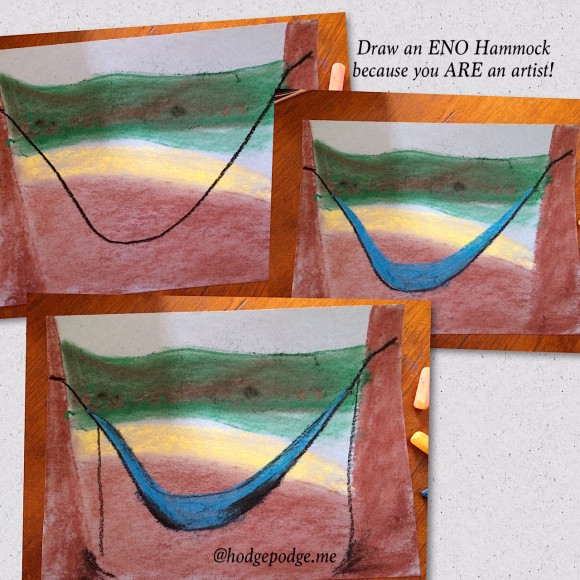
Next is the fun part! The ENO! Take your black chalk pastel and sketch the curved shape of the ENO. The hammock is strapped to the two big trees and the straps are dangling down. While you have your black pastel, go ahead and add a bit of black shadowing at the base of the two big trees.
Take your blue chalk pastel and fill in your ENO. Make sure it stands out against your background. You will need your black pastel once again to add some shadowing underneath the ENO.
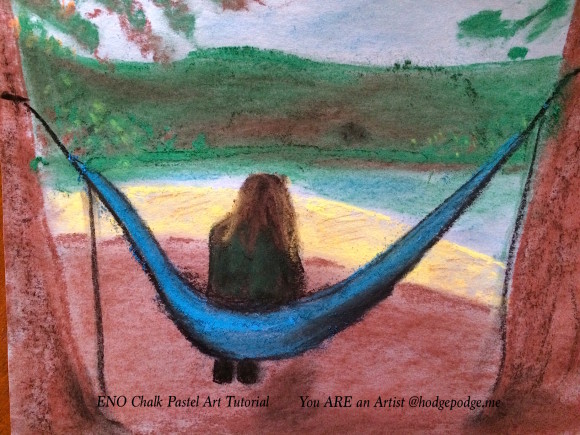
Next, add yourself or someone you love, sitting in the ENO. My daughter loves her ENO, and so I added her figure with a green sweatshirt and long, flowing hair. She is sitting down and dangling her feet. You might add some shoes piled up on the ground or a book. Whatever details make this beautiful outdoor day yours.
Don’t forget to finish the framing of your ENO chalk pastel art with just a few branches at the top of the painting. Just use a bit of smudgy green and brown chalk pastel and smooth it in with your finger.
And remember, you ARE an artist!
Featuring You! You ARE an Artist!
Paint your ENO hammock art and be sure to share with us! Simply tag @chalkpastelart on Instagram, use the #YouAREanArtist hashtag, or upload a photo to the ChalkPastel.com Facebook page!
- A note on chalk pastels: Pastels are an easy, forgiving medium. Fun for children and adults alike! Details on the pastels and paper we use, how and where to purchase, and links to all of Nana’s other pastel lessons are here: Our Favorite Chalk Pastels
- The practical aspects of a mess: Pastels are blessedly messy. We always have baby wipes close by to wipe hands. We wear something we don’t mind getting stained or don a smock.
Have you subscribed to Hodgepodge so you won’t miss any free art tutorials?
-originally published March 2016
So peaceful and so very original! Lovely subject too!
Forever,
Nana